How to Fix Wood Molding | House Painting
Watch more How to Paint Your Home videos: http://www.howcast.com/videos/514643-How-to-Fix-Wood-Molding-House-Painting
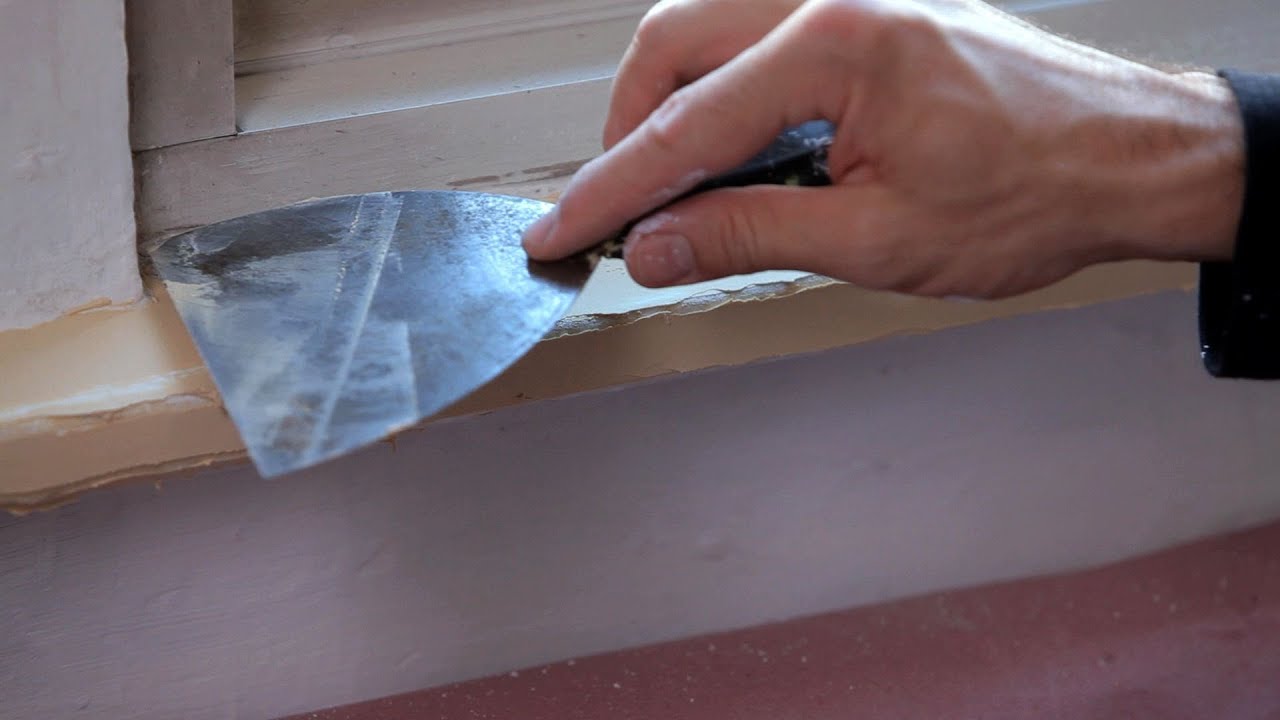
Hi Guys, Dave here! We’re gonna do some repair on wood molding, and we may not have the time totally strip all the paint off of this wood molding. There may be a hundred years of paint. So, a couple of tricks here to just smooth this out and make this nice. It’s a quick restoration. Okay, I’ve got a sander, some really strong 60 grit, and let’s see where this gets me. Alright. And I’ve got my five-in-one here and there’s a big ridge here. I kind of want to knock this off. Oh wow, that’s all coming apart right there. So I want to get this whole area done here first. That was many years, that had to come off. Alright, and we can do some by hand if necessary.
So I’m smoothly this out, by hand or with a sander, to knock off some of the big pieces. Go ahead and seal up that large exposed spot with a bit of my solvent-based primer. We’ll let that set for a moment. And then I’m gonna mix up a special compound and skim over this creating a new surface, nice and smooth. Okay, great, that primer’s dry. Now I’ve used different compounds in the past, you can use Ready-Patch which is a brand itself, in this case I’ve got some wood filler, basic wood filler. Let’s patch this up. Let’s make a nice new skin.
Take some wood filler, now I’m gonna mix it with a little bit of joint compound. I’ve found that these mix, no problem. Alright. So what I want to do here is a quick repair and make a new edge. Now, you get used to doing this if you use these tools to any degree, but I’m gonna pull some of this off. If it’s too thick of course it’ll just crack. Now, when that dries I’ll be able to curve that and sand it okay, and there’ll be some bubbles in here. I may need to do a second coat. You can see a straight edge, a new level surface is being formed. So, this could take a few hours to dry. This could sit overnight, actually. And then you would do some light sanding and see the spots you need to touch-up. But here you’ve created a nice new skinned surface.
You can get quite creative with this stuff, have fun. Okay so getting back to this wood molding surface, I’m at the stage I want to do some sanding. I’ve got my rough sand paper, and my medium 100-grit, and a sanding sponge. Now let’s take a look at what we’ve got here. So that was my rough paper. I’m gonna smooth it out a little bit with 100-grit. Now I’m not going for perfection here. As we know, these old buildings have a lot of character, but it’s gonna be a heck of a lot better than it was before. Alright, let’s give it a little wipe-down. And I’ve got my primer brush. Incidentally, I’ve got my brush in plastic because I knew that I was going to be using this same brush twenty minutes later in a different part of the apartment.
So I didn’t clean it yet but kept it in plastic. And again, I’m gonna put it on pretty thick. I’m gonna smooth it out in a moment. The first step is just getting a thick coat on there. Now we’re gonna smooth it out. Okay. Beautiful. So that’s it on the prepping and repairing stage of the wood molding. You don’t have to make it perfect, you can bring an old space back to life with a little elbow grease, and in about an hour or so that’ll be ready for paint.
![[ID: nRNa_HkgYFQ] Youtube Automatic](https://bizimtube.com/wp-content/uploads/2021/03/id-nrnahkgyfq-youtube-automatic-236x133.jpg)
![[ID: nKvpMq-k4VE] Youtube Automatic](https://bizimtube.com/wp-content/uploads/2021/03/id-nkvpmq-k4ve-youtube-automatic-236x133.jpg)
![[ID: yhITUFbi7H8] Youtube Automatic](https://bizimtube.com/wp-content/uploads/2021/03/id-yhitufbi7h8-youtube-automatic-236x133.jpg)
![[ID: 1G3UK4EgsIM] Youtube Automatic](https://bizimtube.com/wp-content/uploads/2021/03/id-1g3uk4egsim-youtube-automatic-236x133.jpg)
![[ID: _zHdzEzAt9o] Youtube Automatic](https://bizimtube.com/wp-content/uploads/2021/03/id-zhdzezat9o-youtube-automatic-236x133.jpg)
![[ID: gqgRajnKkBI] Youtube Automatic](https://bizimtube.com/wp-content/uploads/2021/03/id-gqgrajnkkbi-youtube-automatic-236x133.jpg)
![[ID: 5-3fSrQTBxI] Youtube Automatic](https://bizimtube.com/wp-content/uploads/2021/03/id-5-3fsrqtbxi-youtube-automatic-236x133.jpg)
![[ID: MgYLCr1GLO8] Youtube Automatic](https://bizimtube.com/wp-content/uploads/2021/03/id-mgylcr1glo8-youtube-automatic-236x133.jpg)
![[ID: ouCtbSdrkWc] Youtube Automatic](https://bizimtube.com/wp-content/uploads/2021/03/id-ouctbsdrkwc-youtube-automatic-236x133.jpg)
![[ID: vVCcQJpk2H4] Youtube Automatic](https://bizimtube.com/wp-content/uploads/2021/03/id-vvccqjpk2h4-youtube-automatic-236x133.jpg)
![[ID: hCMKysXAbco] Youtube Automatic](https://bizimtube.com/wp-content/uploads/2021/03/id-hcmkysxabco-youtube-automatic-236x133.jpg)
![[ID: fM9J7p32XCA] Youtube Automatic](https://bizimtube.com/wp-content/uploads/2021/03/id-fm9j7p32xca-youtube-automatic-236x133.jpg)