How to Make a Dress | Origami
Full Playlist: https://www.youtube.com/playlist?list=PLLALQuK1NDrj_7PjeVpq567LwW5IBeHnG
–
–
Like these Kid’s Activities !!! Check out the official app http://apple.co/1ThDIrx
Watch more How to Make Origami videos: http://www.howcast.com/videos/510914-How-to-Make-a-Dress-Origami
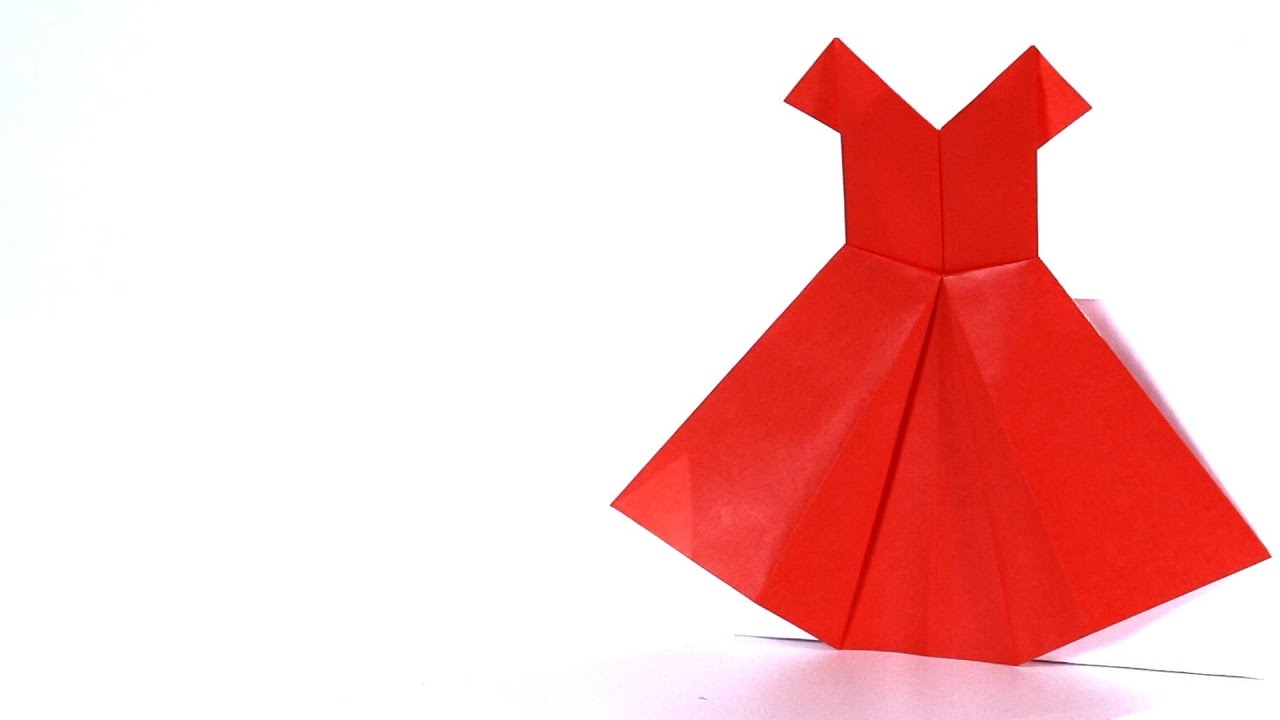
These are the instructions for an origami dress. It’ll look just like that. Start with a sheet of paper, whatever color you like, and we’re going to use the white side up first. We’re going to make a book fold here. So we’re going to take the bottom edge, bring it up to the top and make sure that it’s nice and lined up, so that you don’t have any white showing on the other side, so it’s nice and exact. Go ahead and give that a good crease. Open it up and then rotate it, and we’re going to do the other one as well, so you’ll have two book folds make a nice plus sign right there in the middle of the paper.
Next step we’re going to take the two outside edges and we’re going to fold them into the middle. It’s going to look like, this is called a cabinet fold, so we fold both of those edges into the middle. It sort of looks like cabinet doors or cupboard doors the way that they would open up like that. So go ahead and fold those and then unfold them and flip the paper over. Now we’ve got two mountain folds. You can see how they sort of poke up like that. That’s the way we determine it’s a mountain fold, because it’s folded this direction.
What we’re going to do is, we’re going to take this mountain fold and we’re going to fold it into the middle line, and the best way to do that is to just sort of slide it over. You can see how the paper sort of accordions or pleats right there on the back. But we’re going to take this edge right here, and we’re going to fold it into the exact middle of the paper that we’ve already folded just like this. We’re going to do that on one side and then also on the other side, so you have both sides there and they fold into the middle.
If you look at the paper from the top, you can see how it’s pleated , just like that. All right, now flip the paper back over and we’re going to use this crease we already have here, this halfway mark. Go ahead and fold that down, right along that line, and then we’re going to do another pleat, where we fold it down like this, but then fold it back up just like this. And I’ll show you, it’s about that far, so it’s accordion there as well, because the paper’s been pleated back down.
Then flip it back over to the front, and the front is going to be the top of the dress, and this is going to be the bottom of the dress. In order to get the bottom of the dress, what we’re going to do is we’re going to pull this corner right there, we’re going to pull it and rotate it out to the side. We’re going to rotate it out to the side, there’s a little bit of paper that’s leftover right there. Just use up all that paper and pull it out to the edge. If you go too far, you might rip it, so try and get it spot on just like that, and it’ll make a little panel that pops up right here.
So we’ve folded this flap over to that edge just like that. We’re going to do the same thing on the other side. Go ahead and pull this over, so that it makes another squash fold, just over to the edge just like that, and that makes the front of the dress like that. So we’ve got that finished. Flip the paper over and we’ve got these two little panels right here. We’re going to take these and we’re going to fold them down in a little diagonal fold, just a little triangle comes down, just in the front on the left-hand side and also on the right-hand side.
Now we’ve folded those down, just so we can get the creases on them, so fold them back up. What’s going to happen next is called a petal fold, and the way this works is we’re going to take this top edge, the top edge of the paper and we’re going to pick it up and fold it down. It’s going to make these little squashes on the outside edge. The paper is going to get folded down where it’s going to connect to these two lines. So if you can see right here where we folded these down, the line that we’re going to make is going to go right across the bottom edge of these two triangles.
So when we open this up, fold it down right along that bottom edge and these two panels are going to squash down just like so. This is the back of the model so we don’t have to care too much about being super precise, but that’s the way it’ll look. And now we’re going to fold this triangle ovee, a nice, little red triangle will show up on the left hand side and also on the right hand side just like that.
The next step, we’re going to do another cupboard fold. We’re going to take these two outside edges and fold them into the middle. But this time when we do it; I’ll show you here on the left hand side; when we fold this panel over, this top of the dress is going to want to come w
![[ID: nRNa_HkgYFQ] Youtube Automatic](https://bizimtube.com/wp-content/uploads/2021/03/id-nrnahkgyfq-youtube-automatic-236x133.jpg)
![[ID: nKvpMq-k4VE] Youtube Automatic](https://bizimtube.com/wp-content/uploads/2021/03/id-nkvpmq-k4ve-youtube-automatic-236x133.jpg)
![[ID: yhITUFbi7H8] Youtube Automatic](https://bizimtube.com/wp-content/uploads/2021/03/id-yhitufbi7h8-youtube-automatic-236x133.jpg)
![[ID: 1G3UK4EgsIM] Youtube Automatic](https://bizimtube.com/wp-content/uploads/2021/03/id-1g3uk4egsim-youtube-automatic-236x133.jpg)
![[ID: _zHdzEzAt9o] Youtube Automatic](https://bizimtube.com/wp-content/uploads/2021/03/id-zhdzezat9o-youtube-automatic-236x133.jpg)
![[ID: gqgRajnKkBI] Youtube Automatic](https://bizimtube.com/wp-content/uploads/2021/03/id-gqgrajnkkbi-youtube-automatic-236x133.jpg)
![[ID: 5-3fSrQTBxI] Youtube Automatic](https://bizimtube.com/wp-content/uploads/2021/03/id-5-3fsrqtbxi-youtube-automatic-236x133.jpg)
![[ID: ouCtbSdrkWc] Youtube Automatic](https://bizimtube.com/wp-content/uploads/2021/03/id-ouctbsdrkwc-youtube-automatic-236x133.jpg)
![[ID: MgYLCr1GLO8] Youtube Automatic](https://bizimtube.com/wp-content/uploads/2021/03/id-mgylcr1glo8-youtube-automatic-236x133.jpg)
![[ID: vVCcQJpk2H4] Youtube Automatic](https://bizimtube.com/wp-content/uploads/2021/03/id-vvccqjpk2h4-youtube-automatic-236x133.jpg)
![[ID: hCMKysXAbco] Youtube Automatic](https://bizimtube.com/wp-content/uploads/2021/03/id-hcmkysxabco-youtube-automatic-236x133.jpg)
![[ID: fM9J7p32XCA] Youtube Automatic](https://bizimtube.com/wp-content/uploads/2021/03/id-fm9j7p32xca-youtube-automatic-236x133.jpg)