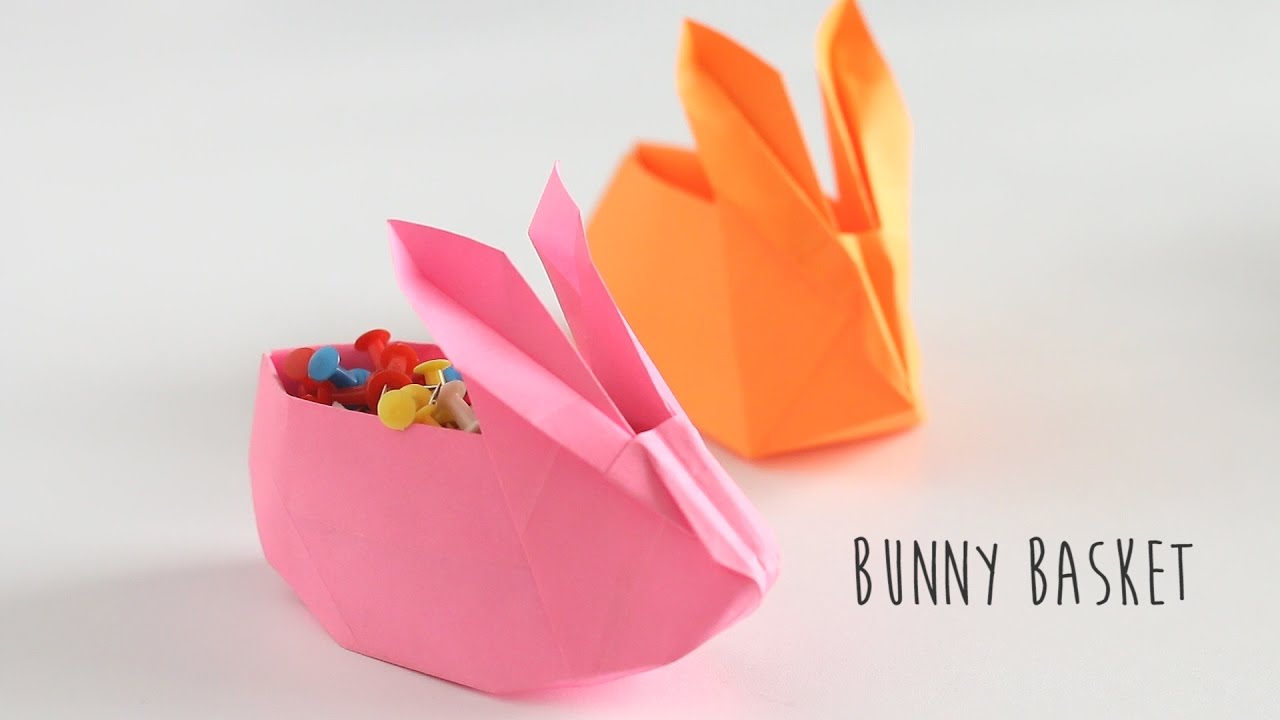
Origami : Bunny Basket
#origami #papercraft #origamibunny
Learn how to fold Origami Bunny Basket
Origami : Bunny Basket
What we need?
Craft paper
How to do ?
Step 1 : Take 20cm * 20cm craft paper. Fold the paper in to half to get a center crease.
Step 2 : Fold the bottom of the paper to meet the center crease and then do the same for top of the paper down to meet the center.
Step 3 : Now the paper would be divided in to eights. Fold the top of the paper down to the first crease and the bottom paper to meet the 3rd crease.
Step 4 : Lift the center and fold up to meet the bottom edge of the paper you just folded. Now rotate and repeat it entirely.
Step 5 : Fold the square in half across the diagonal then rotate and fold across the other diagonal too.
Step 6 : To start the bunny shape open your paper out again and fold the bottom edge up to meet the 2nd crease down from the top.
Step 7 : To make the head take the bottom right corner and fold towards the center to make an upside down triangle. There should be 3 creases. The 3rd crease needs to line up with the diagonal fold. The point will be the tip of the ear.
Step 8 : Flip your paper over. You need to fold along the first crease, Then fold down and crease along the 2nd crease to make the base of your bunny. From the back it should look like a ‘W’ shape. Flip over and fold the bottom left corner up to make another triangle and the other side of the head.
Step 9 : There should be 3 flaps in the back of your bunny. Take the first flap and fold it in to meet the smaller flap in the center. The smaller flap in the center makes a pocket. And then fold the top edge down and fold along the existing crease. Fold this flap into the pocket. As you do this you need to flatten out the inside of the ear to make a triangle inside your bunny basket. Do this both the sides.
Step 10 : Well now we need to push it in to make a reverse fold. It’s marked in 2nd square down on the left with the bone folder. It should collapse in like we did with the ‘W’ folds earlier.
Step 11 : Time for ears now. Make a small fold between 1st fold and at intervals of 2nd and 3rd. Repeat and make a 2nd fold using the 1st fold as a guide. The point of the first fold needs to line up with the 1st crease on the head. When you make the 2nd fold make sure to only fold halfway and then extend the fold up to the tip of the ear, this will make the ear pop out. This same process for 2nd ear too.
Step 12 : Make a small triangle fold on each side to get the head.
Step 13 : For more detail kindly check our video.
Author: Jacky Chan
Follow us on Instagram: https://www.instagram.com/ventunoart
Subscribe Youtube: https://www.youtube.com/user/TheVentunoart


![[ID: IQaBuK5keYU] Youtube Automatic](https://bizimtube.com/wp-content/uploads/2021/03/id-iqabuk5keyu-youtube-automatic-236x133.jpg)
![[ID: 3kS5GVQN-oY] Youtube Automatic](https://bizimtube.com/wp-content/uploads/2021/03/id-3ks5gvqn-oy-youtube-automatic-236x133.jpg)
![[ID: -A0BuPI2dJc] Youtube Automatic](https://bizimtube.com/wp-content/uploads/2021/03/id-a0bupi2djc-youtube-automatic-236x133.jpg)
![[ID: eC4n5QIbUXk] Youtube Automatic](https://bizimtube.com/wp-content/uploads/2021/03/id-ec4n5qibuxk-youtube-automatic-236x133.jpg)
![[ID: M3Kyx0OlbHU] Youtube Automatic](https://bizimtube.com/wp-content/uploads/2021/03/id-m3kyx0olbhu-youtube-automatic-236x133.jpg)
![[ID: qtPmSLriaFo] Youtube Automatic](https://bizimtube.com/wp-content/uploads/2021/03/id-qtpmslriafo-youtube-automatic-236x133.jpg)
![[ID: FsEd3bHVyaw] Youtube Automatic](https://bizimtube.com/wp-content/uploads/2021/03/id-fsed3bhvyaw-youtube-automatic-236x133.jpg)
![[ID: O8WkN_RSZOE] Youtube Automatic](https://bizimtube.com/wp-content/uploads/2021/03/id-o8wknrszoe-youtube-automatic-236x133.jpg)
![[ID: gFBSl3gLNow] Youtube Automatic](https://bizimtube.com/wp-content/uploads/2021/03/id-gfbsl3glnow-youtube-automatic-236x133.jpg)
![[ID: EYw7P1oZgPg] Youtube Automatic](https://bizimtube.com/wp-content/uploads/2021/03/id-eyw7p1ozgpg-youtube-automatic-236x133.jpg)
![[ID: 2ItnIdLSlog] Youtube Automatic](https://bizimtube.com/wp-content/uploads/2021/03/id-2itnidlslog-youtube-automatic-236x133.jpg)
![[ID: 36ctGdbPkcY] Youtube Automatic](https://bizimtube.com/wp-content/uploads/2021/03/id-36ctgdbpkcy-youtube-automatic-236x133.jpg)